This site is the personal blog and project repository of George Farris.

If you are looking for the old Cowichan Valley Linux Users Group, check the side navigation. This site contains links to various projects that I either created or contribute to.

You will also find my Github page and Youtube channel here. Contact: cwg@cowlug.org


Latest News

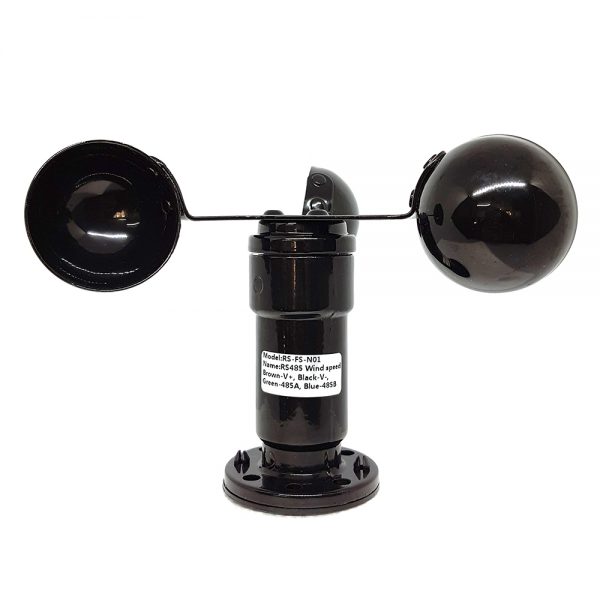
PR-3000-FS-N01 Wind speed transmitter

Posted on: November 8, 2021, in AllPythonRaspberry Pi

This describes getting a FS-N01 anemometer working with some python 3 code on a Raspberry PI with a Waveshare 2 channel RS485 hat.

FS-N01 Wind Speed Transmitter
Waveshare 2 Channel RS485 HAT

The anemometer has Chinese markings on it for V+, V-, 485A and 485B.  Obviously the V+ and V- are for power supply and I used 12VDC.  The manual I found online states 10-30VDC.

The RS485 lines are marked with a Chinese symbol for their colour.  My manual stated Yellow and blue and yet the device I have was Green and Blue.  Just lookup the corresponding Chinese character and get the translation for the colour if you don’t speak the language.  Mine was:

 
V+ – Brown – 棕
V- – Black – 黑
485A – Green – 绿
485B – Blue – 绿

The Waveshare 2 channel RS485 hat required an edit to the /boot/config.txt file of the raspberry pi. Add the following line and then reboot.

dtoverlay=sc16is752-spi1,int_pin=24

You should now see 2 devices in /dev:

/dev/ttySC0 and /dev/ttySC1, these of course are your serial ports.


Copy the python3 code below and your wind speed should be displayed in Kilometers per hour when you run it.


#!/usr/bin/python3
# -*- coding:utf-8 -*-
# Copyright (C) 2021  George Farris <farrisg@gmsys.com>
#
# This program is free software: you can redistribute it and/or modify
# it under the terms of the GNU General Public License as published by
# the Free Software Foundation, either version 3 of the License, or
# (at your option) any later version.

# This program is distributed in the hope that it will be useful,
# but WITHOUT ANY WARRANTY; without even the implied warranty of
# MERCHANTABILITY or FITNESS FOR A PARTICULAR PURPOSE.  See the
# GNU General Public License for more details.

# You should have received a copy of the GNU General Public License
# along with this program.  If not, see <http://www.gnu.org/licenses/>.

# Anemometer.py is reference code to read a PR-3000-FS-N01, RS465 Anemometer
# on a raspberry pi 4 using a Waveshare 2 channel RS485 HAT.
# https://www.waveshare.com/2-ch-rs485-hat.htm

import serial
import os
import sys
import time
import RPi.GPIO as GPIO

SERIAL_PORT = "/dev/ttySC0"
TXDEN_1 = 27
TXDEN_2 = 22

# Calculate CRC16 Checksum
def _crc16(data, no):
    crc = 0xffff
    poly = 0xa001   # Polynomial used for Modbus RS485 applications
    temp = no

    while True:
        crc ^= data[temp - no]        
        for i in range(0, 8):
            if crc & 0x0001:
                crc = (crc>>1) ^ poly
            else:
                crc >>= 1
        no -= 1;
        if no == 0:
            break

    return crc & 0xffff

# Open the serial port at 4800 buad
ser = serial.Serial(port=SERIAL_PORT, baudrate=4800)

# Set the mode on the Raspberry Pi GPIO
GPIO.setmode(GPIO.BCM)
# Set this to avoid warning of channel in use
GPIO.setwarnings(False)

# Set the GPIO pin as output for port 1 and 2 on the WAVESHARE RS485 HAT (SC16IS752)
# and then set the bit HIGH to enable the ports
GPIO.setup(TXDEN_1, GPIO.OUT)
GPIO.setup(TXDEN_2, GPIO.OUT)
GPIO.output(TXDEN_1, GPIO.HIGH)
GPIO.output(TXDEN_2, GPIO.HIGH)

# Now lets setup and inquiry packaet for the PR-3000-FS-N01, RS485 Anemometer

# Set the length of the transmit buffer
tx_buf = [0] * 8
tx_buf[0] = 1    # MODBUS ID
tx_buf[1] = 3    # MODBUS Function code (read holding register)
tx_buf[2] = 0    # Starting address of register - High byte
tx_buf[3] = 0    # Low byte
tx_buf[4] = 0    # How many registers to read - High byte
tx_buf[5] = 1    # Low byte

# Get the CRC of the packet
crc = _crc16(bytearray(tx_buf), 6)
# Add the crc bytes to the end of the transmit buffer
tx_buf[6] = (crc & 0x00ff)
tx_buf[7] = ((crc >> 8) & 0xff)

# pack the buffer
data = bytearray(tx_buf)

# Set board in transmit mode and write data
GPIO.output(TXDEN_1, GPIO.LOW)
ser.write(data)
# Waiting to finish sending
time.sleep(0.01)
# Set board to receive mode
GPIO.output(TXDEN_1, GPIO.HIGH)

# get six bytes plus crc = 8 bytes total
data_t = [0] * 8
for i in range(7):
    data_t[i] = int.from_bytes(ser.read(1), 'little')

# Current wind speed example: 0056 H (hexadecimal) = 86 => Winds = 8.6m / s
# Add bytes 3 and 4 then divide by 10 to get meters per second
# Then divide by 1000 to get Kilometers per second
# now mutitply by 3600 to get kmh
ms = float(data_t[3] + data_t[4]) / 10.0
kmh = ms / 1000 * 3600
print('Kilometers per hour {0:>.1f}'.format(kmh))

# Typical response example
#b'\x01'
#b'\x03'
#b'\x02'
#b'\x00'
#b'\x56' Current wind speed: 0056 H (hexadecimal) = 86 => Winds = 8.6m / s
#b'\xb8'
#b'D'


Home Assistant component development

Posted on: November 14, 2018, in AllHome AssitantPython

This is my attempt to document the development of a component and binary_sensor platform, for the Home Assistant project.

This is the code you should use to meet requirements to get accepted into HA.
Read the article.


Python driver for the W800rf32 family of X10 RF receivers.

Posted on: October 25, 2018, in AllHome AssitantPython

I recently put a driver up on PYPI for the W800rf32 family of X10 RF receivers from WGL & Associates.
I use this with the following devices:

KR19A
MS16A
RSS13

Here is the github page: W800RF32

This is available to install via PIP:
pip3 install pyW800rf32

All of the logic for the decoding I wrote for the Pytomation project.
Here is an example of using the code, note: very little error checking here.
My reason for doing a PYPI project was to write and include a driver for Home Assistant.


Hue Commander

Posted on: January 4, 2016, in AllHeathkit H8Python

I have released a Linux console, python utility, called "huecmdr.py". You can use it to test various aspects of the Philips HUE lighting system. It runs great in any X terminal as well.

It has the following features:
  • Authenticate your computer with the bridge
  • Ask the bridge to search for newly purchased bulbs
  • List all the bulbs known to the bridge
  • Select a bulb for testing
    • Test various values of
    • RGB colours
    • Colour temperature
    • Hue and Saturation
    • Brightness

This utility is a great way of selecting a value to use in your Pytomation Instance file. You can find the Source on the Pytomation github site.


H19term

Posted on: January 4, 2015, in AllHeathkit H8Python

H19term aims to provide close to 100 percent software emulation of the Heathkit H19, also known as Zenith Z19, hardware video terminal.

It currently has the following features:

  • Software bell – User configurable sound
  • Heath mode
  • Ansi mode
  • Supports 25th line.
  • Support all graphics characters.
  • Custom font files for the Linux console, includes Raspberry Pi
  • Serial Port logging.
  • Help files available for ascii characters, CP/M quick help and user manual.
  • Easily configurable in .h19termrc file
  • Colour changing mode for Amber and Green or other colours.
  • Help files directly inside h19term.

Requirements

H19term is written in Python version 2.7. It won’t run in Python 3.x without some modifications.

You will also require the Pyserial package. The Pyserial home page is here if you want more information about it. You can install it with your standard package manager

Download

Download the h19term tarball and follow the instructions in the README file.

The github page is https://github.com/horga83/h19term

Installation

See the h19-readme.txt file or go to the github page and scroll down.

As noted before Python should already be installed in most Linux distributions.

Videos

Inital Release. Release V1.2